Kamal is a deployment tool for deploying Rails apps to cloud environments. And Azure is a fantastic cloud service provider (I work for Microsoft) to deploy Rails apps.
Let's try to deploy a test Rails app with a Sqlite3 DB to Azure.
Although this guide will go into details about setting up various systems in Azure, the guide assumes that you have Azure account and billing setup already. The guide also assumes some preliminary understanding of Rails.
Here are the exact versions of tools I am using as of April 7, 2024.
- Ruby: 3.3.0
- Rails: 7.2.1
- Kamal: 1.3.1
- Sqlite: 3.43.2
1. Settings up Rails App
1.1 Create a new Rails app
$ rails new rails-kamal-deployed-to-azure --minimal
1.2 Add a scaffold
$ cd rails-kamal-deployed-to-azure$ rails g scaffold post title:string content:text
1.3 Run migration
- You can omit
rails db:createbecause database will be created by starting docker-compose - Run
$ rails db:migrate
1.4 Update routes
In routes.rb,
root "posts#index"
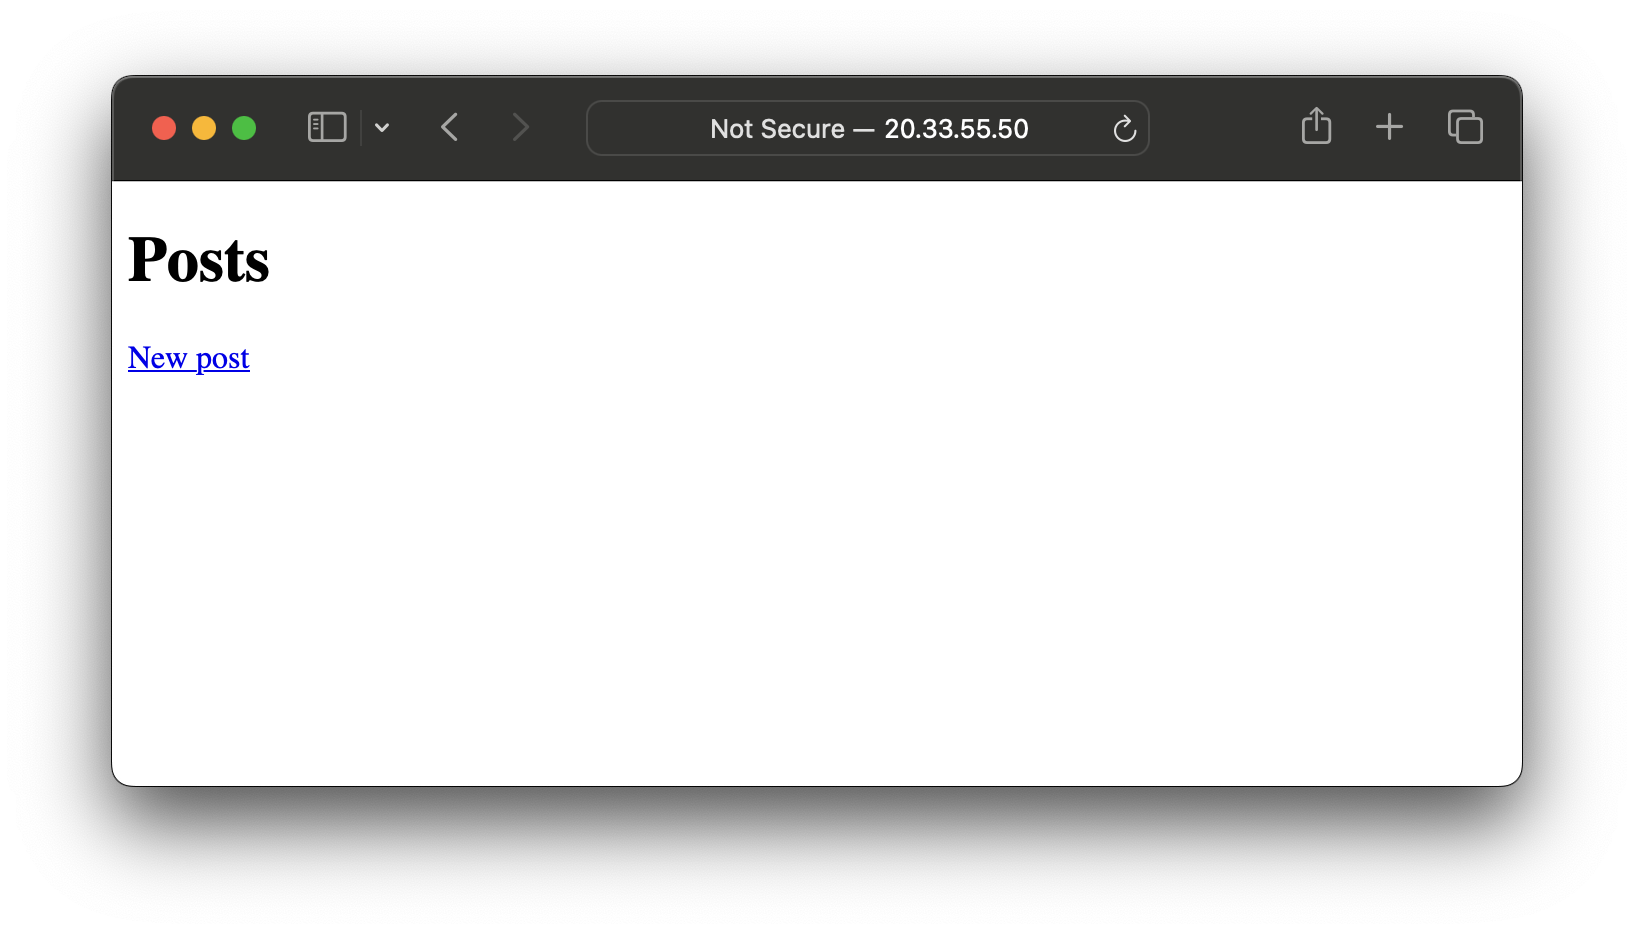
1.5 Start the server to test locally
$ ./bin/rails s- Check that the server is locally running.
- Go to localhost:3000
- You should see something like this.
2. Azure
You should have a subscription and a resource group for Azure before you proceed.
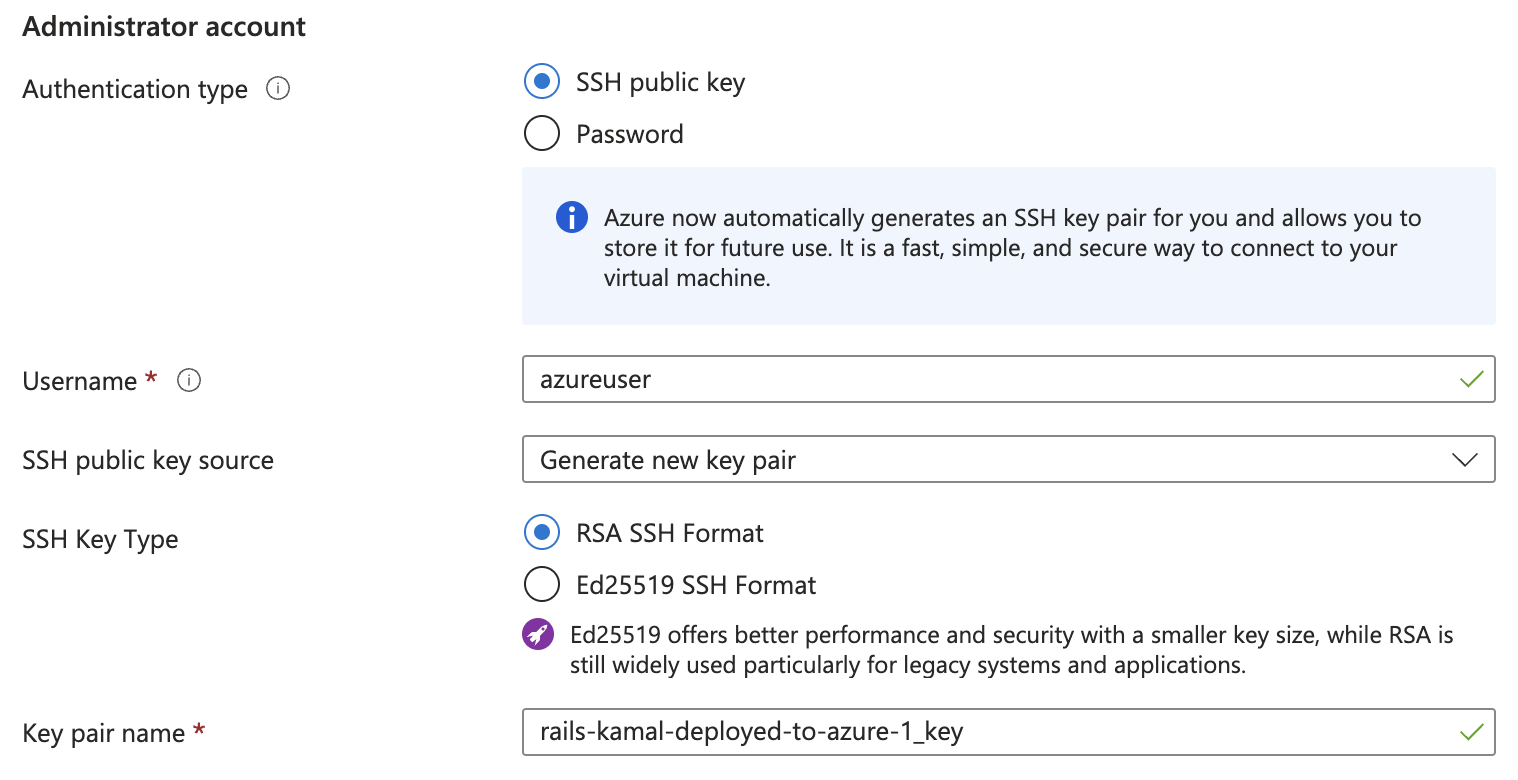
2.1 Create virtual machines
- Go to https://portal.azure.com/#create/Microsoft.VirtualMachine-ARM
- Select a subscription and a resource group.
- Use a name like
rails-kamal-deployed-to-azure-1 - Choose
SSH public keyforAuthentication type > Administrator account. - Add
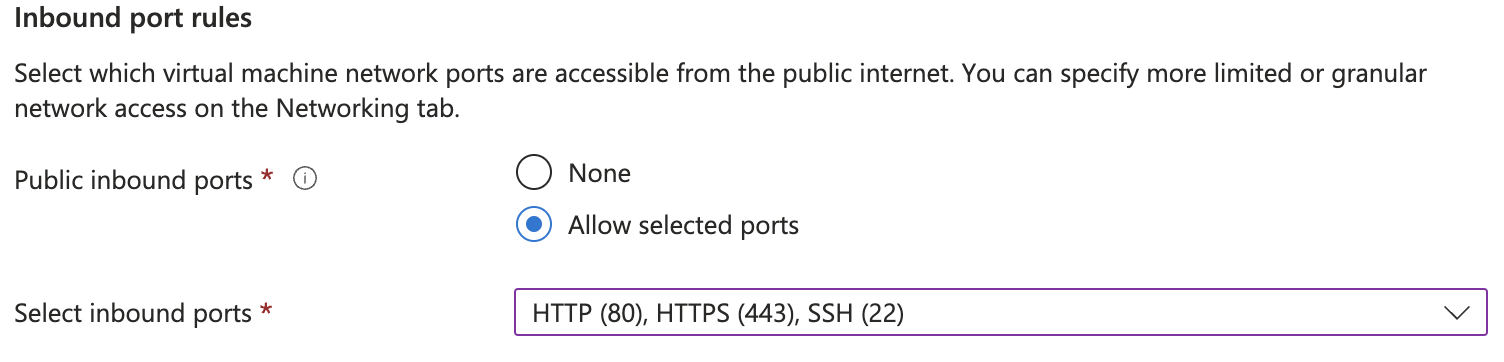
Key pair name. Use a name likerails-kamal-deployed-to-azure-1_key. - Enable ports 22, 80, 443
- Click "Review + create"
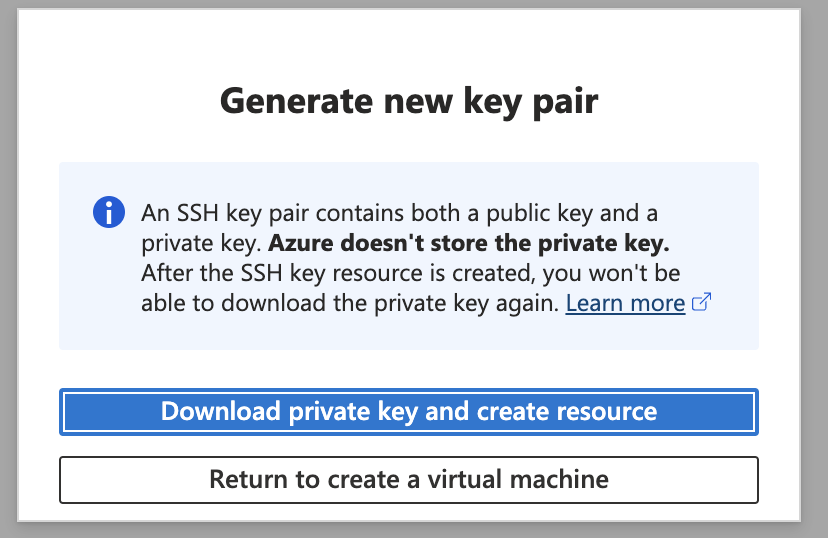
- Download the key when prompted and keep it handy.
2.1.1. Update SSH config
- Inside
~/.ssh/config - Add
Host 74.235.199.96
  IdentityFile ./rails-kamal-deployed-to-azure-1_key.pem
  User azureuser
$ ssh-add ~/.ssh/rails-kamal-deployed-to-azure-1_key.pem- You may get
$ ssh-add ~/.ssh/rails-kamal-deployed-to-azure-1_key.pem
@@@@@@@@@@@@@@@@@@@@@@@@@@@@@@@@@@@@@@@@@@@@@@@@@@@@@@@@@@@
@         WARNING: UNPROTECTED PRIVATE KEY FILE!          @
@@@@@@@@@@@@@@@@@@@@@@@@@@@@@@@@@@@@@@@@@@@@@@@@@@@@@@@@@@@
Permissions 0644 for '/Users/jasonkim/.ssh/rails-kamal-deployed-to-azure-1_key.pem' are too open.
It is required that your private key files are NOT accessible by others.
This private key will be ignored.
$ chmod 600 ~/.ssh/rails-kamal-deployed-to-azure-1_key.pem- Now you can add it.
$ ssh-add ~/.ssh/rails-kamal-deployed-to-azure-1_key.pem Identity added: /Users/jasonkim/.ssh/rails-kamal-deployed-to-azure-1_key.pem (/Users/jasonkim/.ssh/rails-kamal-deployed-to-azure-1_key.pem) - check that ssh-ing into the VM works
- Make sure the VM is turned on.
- You may get
- SSH into the box
$ sudo usermod -aG docker $USER
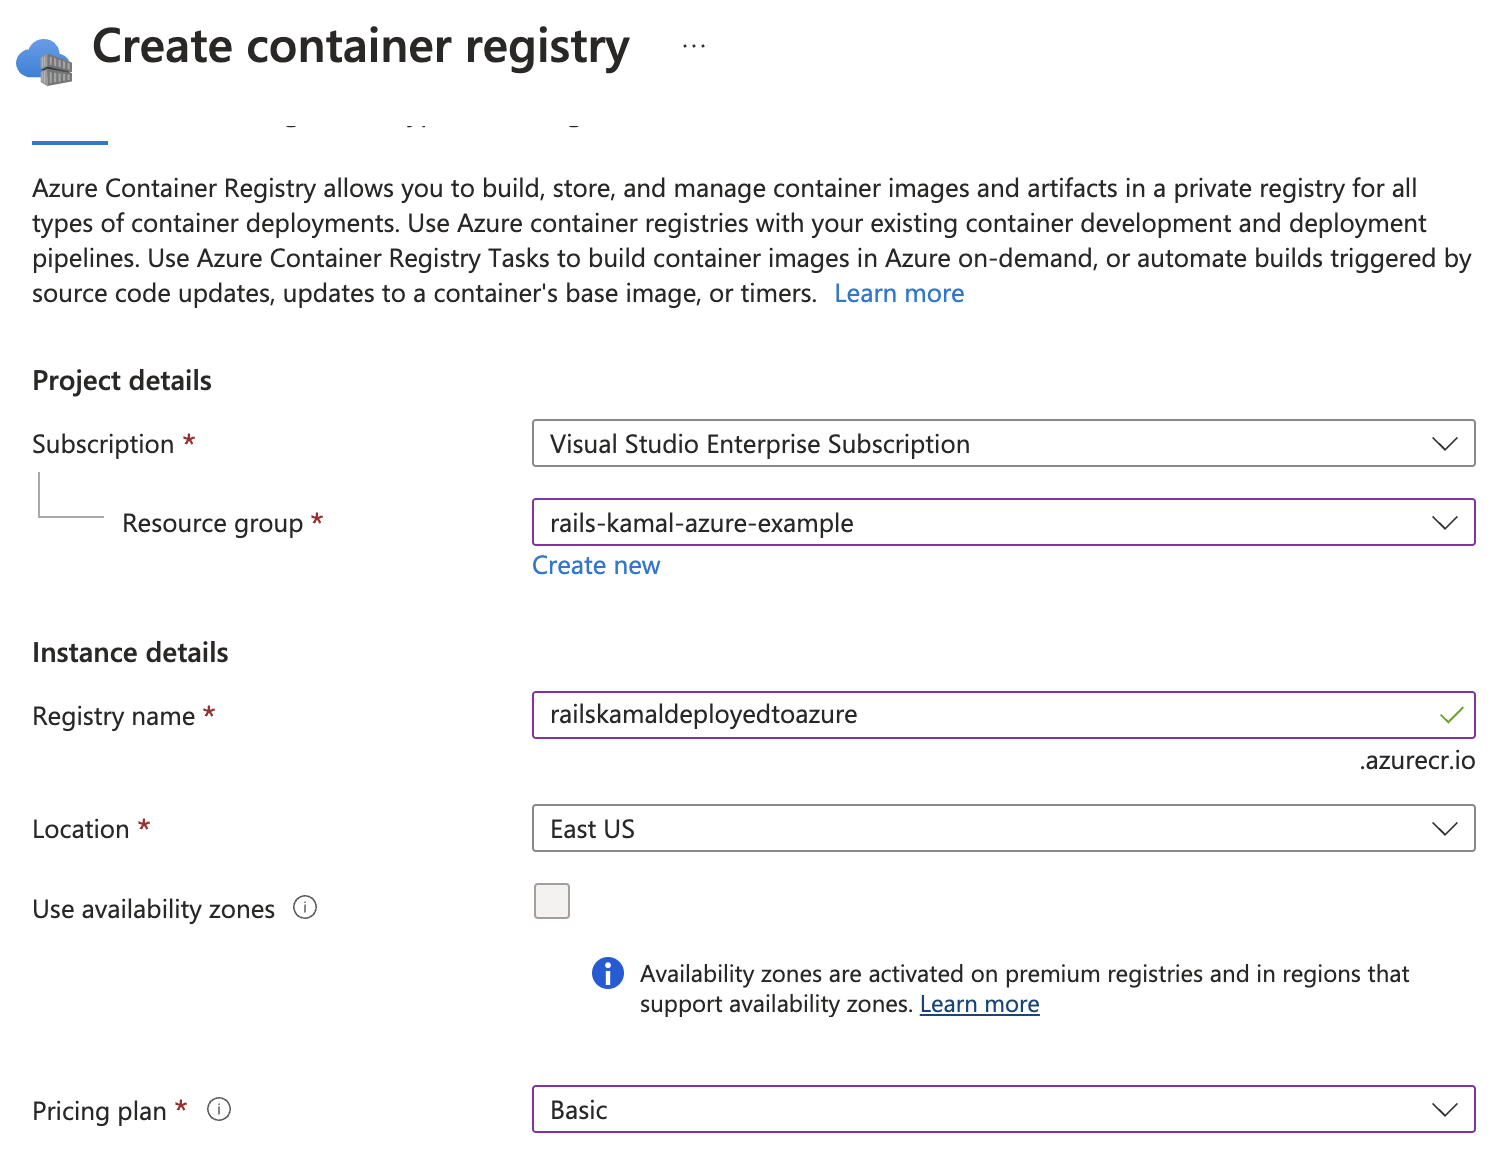
2.2 Create Container Registry
- Go to https://portal.azure.com/#browse/Microsoft.ContainerRegistry%2Fregistries
- Create a Container Registry
- Once the registry is created, go to the registry resource
- Go to Settings > Access Keys section
- Check "Admin user"
- Copy the passwords
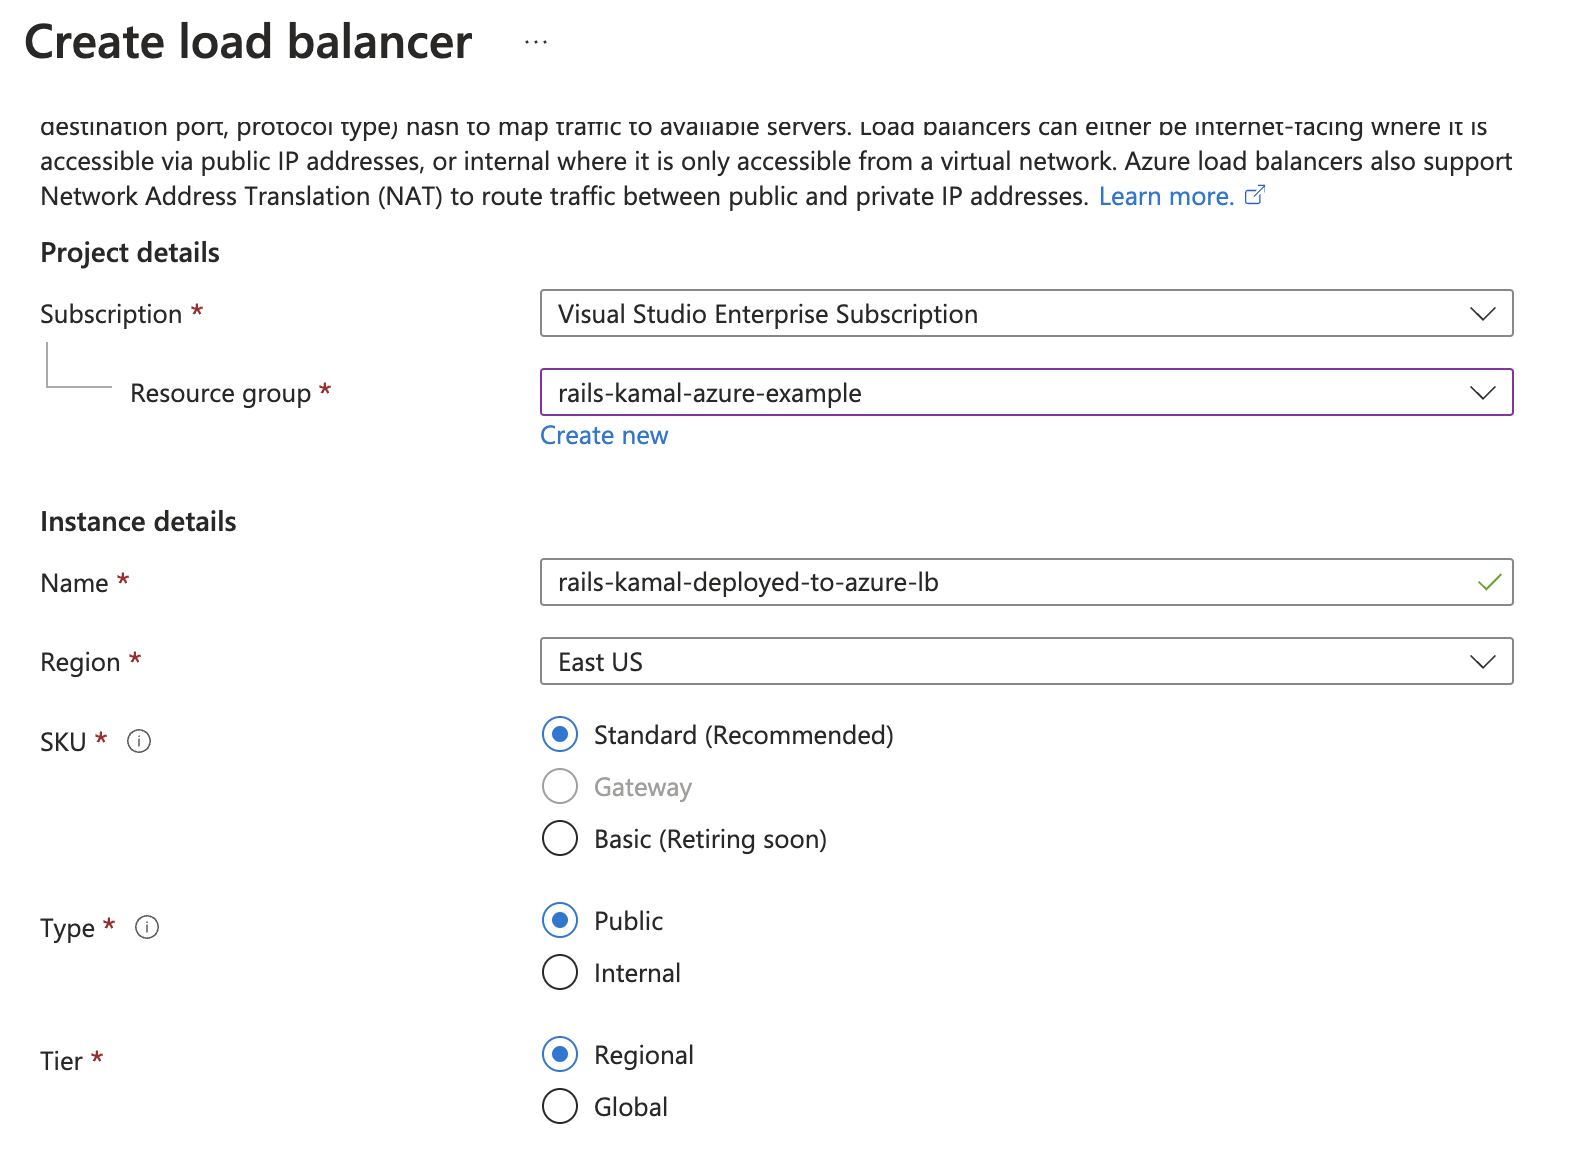
2.3 Create a load balancer
- Go to https://portal.azure.com/#create/Microsoft.LoadBalancer-ARM
- Under Basics, setup the load balancer like this
- Click Next: Frontend
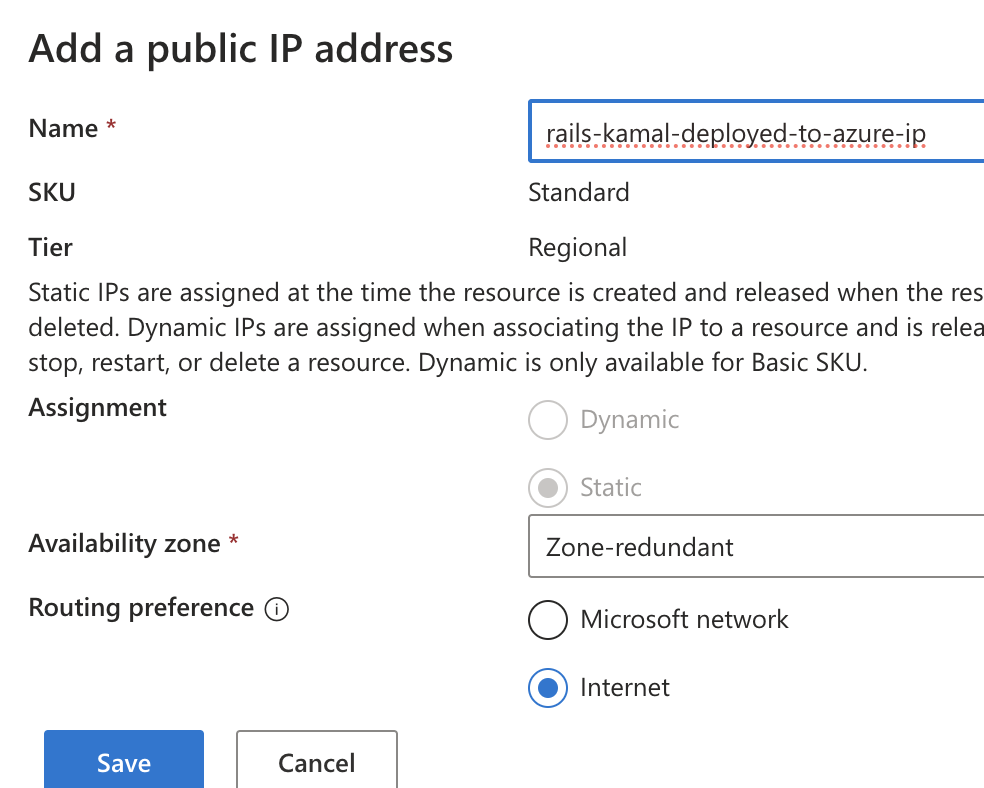
- Click "Add a fronted IP Configuration"
- You'll need to create a public IP Address.
- Click "Create New" under Public IP Address
- Create one like this
- Click "save" to add frontend IP configuration
- Click "Review + create"
- Click "create"
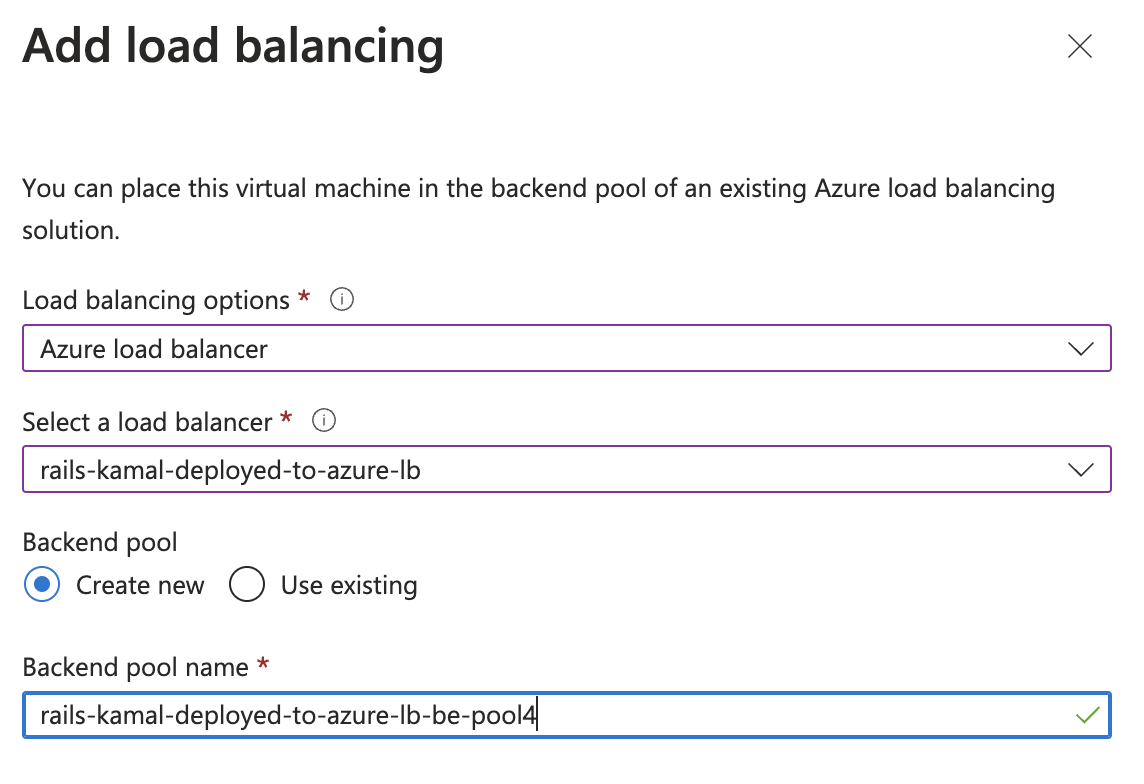
2.4 Setup VM to use the LB
- Go to the VM page
- Click on the VM that should be behind the load balancer
- Click Network > Load balancing
- Click Add load balancing
- Click Add existing
- Setup load balancing like the following
- Click Save
- This should take upto a minute
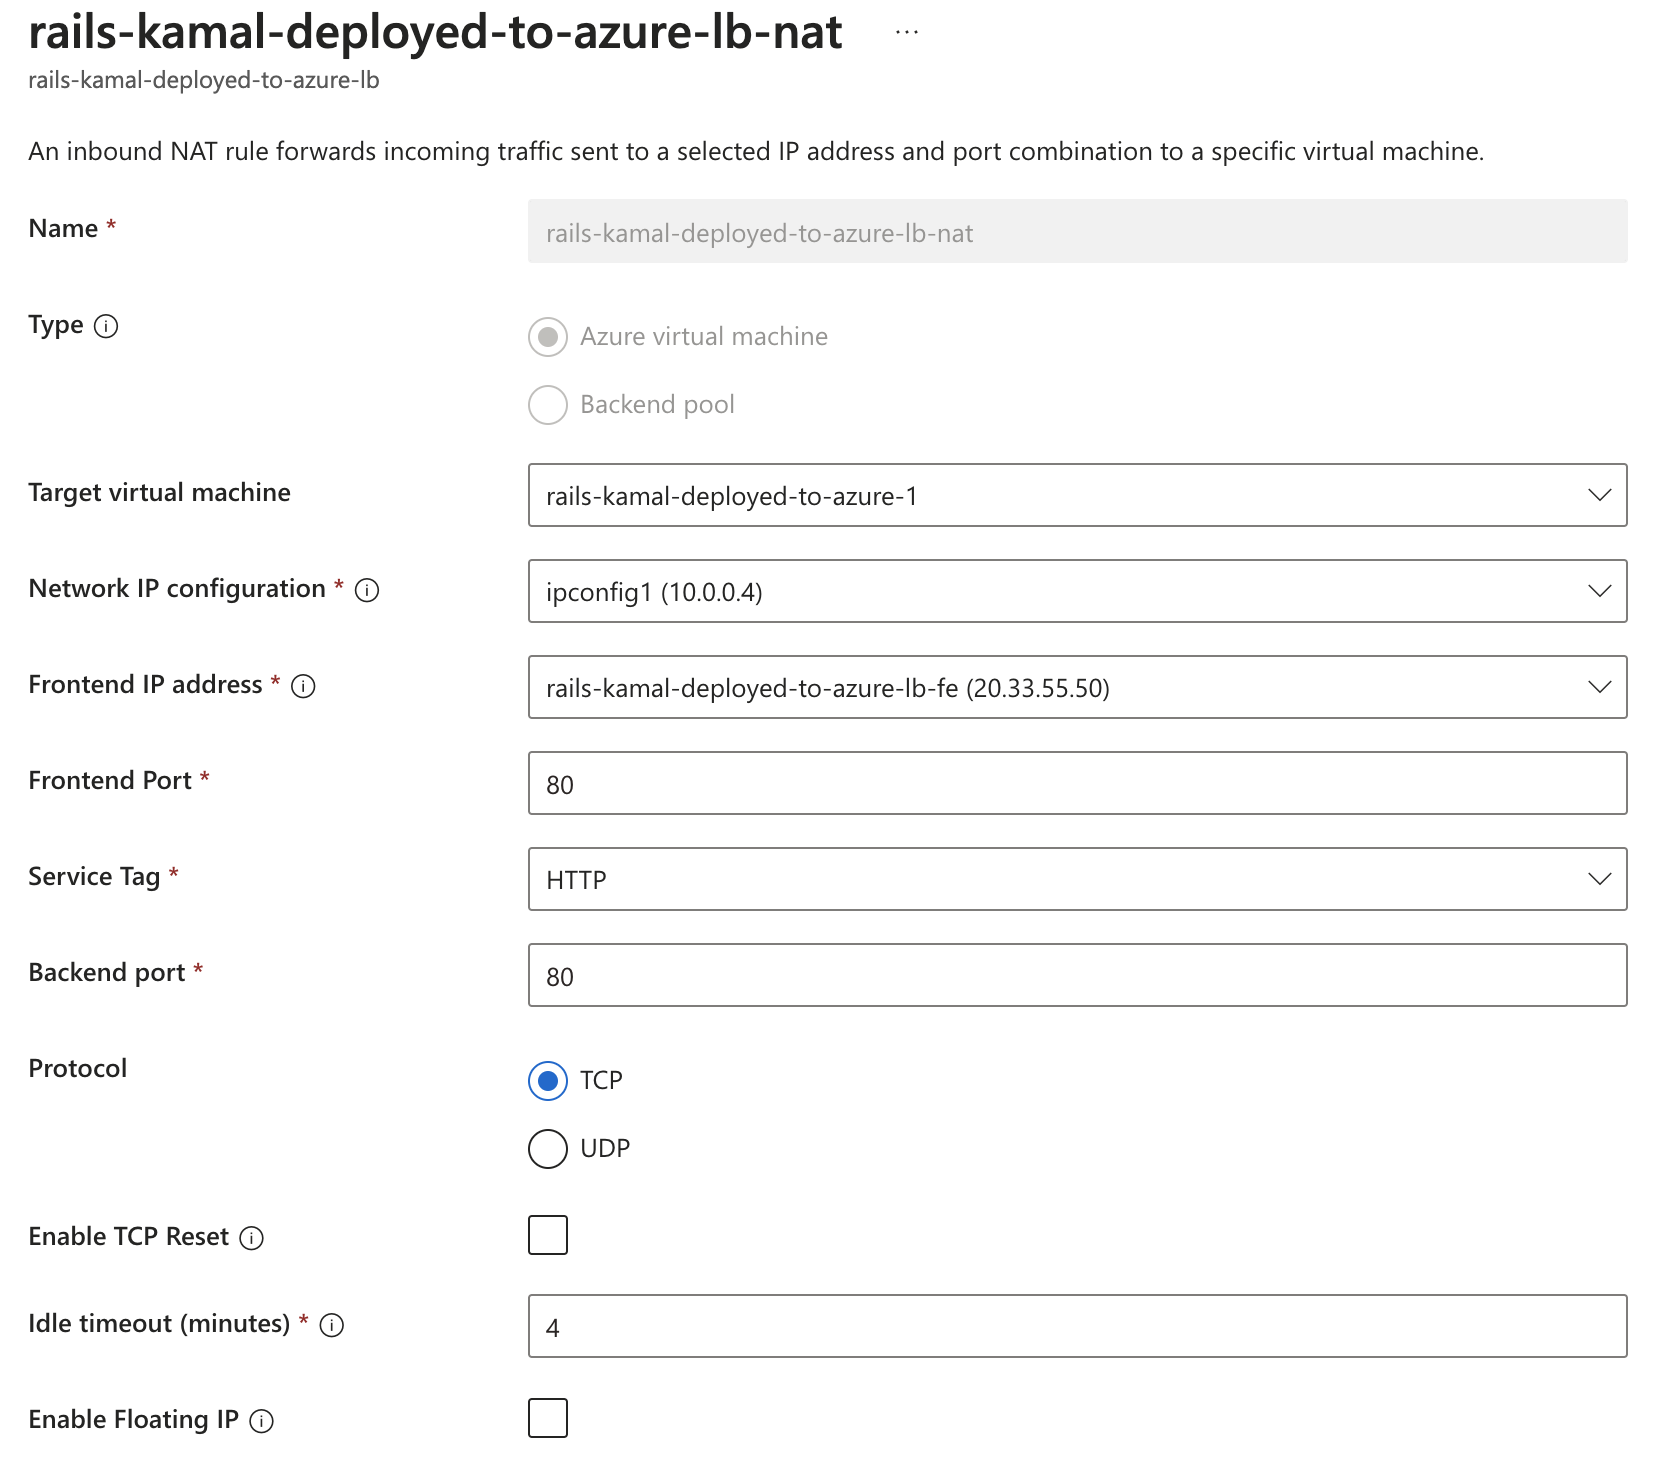
2.5 Add NAT rule
- Go select the load balancer
- Go to Settings > Inbound NAT Rules
- Add
- Setup the rule like below
3. Kamal Setup
Before you begin, make sure Docker is locally running from the machine that you are deploying from.
Follow the instructions found here.
$ gem install kamal- inside your app directory, run
$ kamal init
3.1 Rails Secret
- Run
$ bin/rails credentials:edit - Copy the value
- Paste to
.envfile forRAILS_MASTER_KEYenvironment variable.
If you skip this, you will likely face an error like below:
 ERROR bin/rails aborted!
ArgumentError: key must be 16 bytes (ArgumentError)

        cipher.key = @secret
                     ^^^^^^^
/rails/config/environment.rb:5:in `<main>'
Tasks: TOP => db:prepare => db:load_config => environment
(See full trace by running task with --trace)
bin/rails aborted!
ArgumentError: key must be 16 bytes (ArgumentError)

        cipher.key = @secret
                     ^^^^^^^
/rails/config/environment.rb:5:in `<main>'
3.1 config/deploy.yml
# Name of your application. Used to uniquely configure containers.
service: rails-kamal-deployed-to-azure

# Name of the container image.
image: serv/rails-kamal-deployed-to-azure

# Deploy to these servers.
servers:
  - 74.235.199.96

# Credentials for your image host.
registry:
  # Specify the registry server, if you're not using Docker Hub
  server: railskamaldeployedtoazure.azurecr.io
  username: railskamaldeployedtoazure

  # Always use an access token rather than real password when possible.
  password:
    - KAMAL_REGISTRY_PASSWORD
# Inject ENV variables into containers (secrets come from .env).
# Remember to run `kamal env push` after making changes!
env:
  #   clear:
  #     DB_HOST: 192.168.0.2
  secret:
    - RAILS_MASTER_KEY
# Use a different ssh user than root
ssh:
  user: azureuser

# To use Sqlite
builder:
  context: .
volumes:
  - 'storage:/rails/storage'
3.2 dotenv kamal setup
- You may get this error:
permission denied while trying to connect to the Docker daemon socket at unix:///var/run/docker.sockwhen you rundotenv kamal setupfor the first time. - For this run
sudo usermod -aG docker ${USER}[1] - If the command runs successfully, you should see
  INFO [f489cd69] Finished in 0.326 seconds with exit status 0 (successful).
  Finished all in 87.1 seconds
Releasing the deploy lock...
  Finished all in 91.9 seconds
-
Try going to the IP address of the load balancer.
-
Also you may or may not need
dotenvin front of runningkamal setup.- There were changes to how Kamal 2 handles secret environment variables, and to force load the secret variables
dotenvis needed.
- There were changes to how Kamal 2 handles secret environment variables, and to force load the secret variables